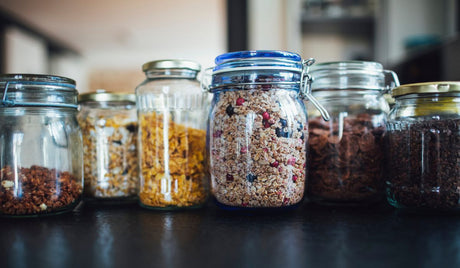
Up to 30 percent of stored grains spoil within a year when oxygen is left unchecked—yet when I store that same rice in Mylar bags with the right oxygen absorbers, it can stay table‑ready for 25 to 30 years! In this guide, I’ll break down mylar bags for long-term food storage, run through the math behind oxygen‑absorbers, and share the exact steps I use in my own prepper pantry.
Table of Contents
Why Mylar Bags Choose for Long‑Term Food Storage
What are Mylar Bags made out of?
When I say “Mylar,” I’m talking about a laminate of oriented polyester (PET) bonded to an aluminum layer and food‑grade polyethylene (PE). This sandwich creates a material that’s tough, flexible, and—most important—engineered for food contact. Unlike the rigid walls of an HDPE
The 7‑Layer Barrier: Light, Moisture & Oxygen Shield
Here’s the data that sold me: metallized PET—what we call “Mylar”—posts an oxygen‑transmission rate (OTR) as low as 0.01 cc/100in²/day, compared with 150–200cc/100in²/day for plain HDPE . That’s a 15,000% to 20,000% improvement. Even a “high‑barrier” label only kicks in when OTR drops under 1cc/100in²/day, so Mylar doesn’t just meet the standard—it smashes it. Add 0.01 water‑vapor transmission, and you’ve got a food‑grade vault against humidity.
Think of each layer as a goalie:
- PET brings tensile strength—your bag survives a shove‑fest in the pantry.
- Aluminum blocks 100 percent of visible light, so vitamins don’t bleach out.
- PE adds a safe, heat‑sealable lining that keeps the metal from cracking when you flex the bag.
Shelf‑Life Gains: Mylar vs. BucketsBuckets vs. Vacuum Sealing
- White rice in 1‑gallon Mylar bags with 300 cc absorbers stays table‑ready for 30 years; the same rice in a
bucket needs a fresh absorber every time you pry the lid. - Rolled oats, pasta, and beans show similar curves: under 2 percent residual O₂ in Mylar after 48 hours, while bucket O₂ rebounds to 10 percent within six months, slashing shelf life by half.
- My own “basement bucket” experiment found visible insect activity after 18 months; the food in Mylar stored right beside it remained pest‑free.
Picking the Perfect Thickness: Why 5‑Mil Wins
Mylar comes in gauges from 3 mil up to 7 mil. I’ve handled thousands of bags, and 5‑mil is the sweet spot—thick enough to shrug off elbow punctures yet still pliable for a tight heat seal. Anything thinner risks pinholes; any thicker drives cost up without a big jump in barrier performance (remember, aluminum does most of the blocking). Whether you’re filling 1‑gallon Mylar bags for variety or 5‑gallon liners for wheat, look for that 5‑mil label from a trusted brand like Wallaby or our own Canadian Preparedness line.
Quick gauge guide:
- 4 mil: okay for snack‑size use; double‑bag for staples.
- 5 mil: everyday workhorse—best mylar bags for food if you ask me.
- 7 mil: specialty, extra‑tough; ideal when you can’t add a bucket shield.
Why you should store food in Mylar with Buckets
Rats can chew through almost anything that isn’t steel. If your long‑term cache lives in a garage or shed, I still store food‑filled Mylar inside a food‑grade bucket or steel drum. The bucket supplies tooth resistance and stack strength; the mylar food storage bags inside guards against oxygen, moisture, and micro‑pests. It’s a belt‑and‑suspenders approach that takes staples like wheat, rice, and beans from a 5‑year gamble to a 25‑year sure thing—critical for emergency preparedness.
Pairing checklist:
- Line bucket with an open 5‑gallon bag.
- Fill, tap to settle, drop in the right CC absorber.
- Heat‑seal the bag first, then hammer on a gamma lid.
Buckets are perfect for storing and keeping your pantry neat, but Mylar bags beat buckets on every barrier metric that matters. For the lowest oxygen levels, longest shelf life, and most compact storage, I reach for Mylar every single time—then slip that sealed bag into a bucket when critters might crash the party.
What are the Best Type of Mylar Bags for Food Storage
Picking the right mylar bags for food storage isn’t a one‑size‑fits‑all decision. Bag style, capacity, food‑safe credentials, brand quality, and even color all affect how long your staples last and how easy they are to rotate. Here’s how I weigh each factor when stocking my own prep shelves.
Flat vs. Gusseted vs. Zippered: Which Style Matches You?
Flat pouches lie smooth and stack like pages in a binder—great for single‑serving freeze‑dried meals. Gusseted bags open into a box shape, letting me pour beans or flour without a funnel. Zippered tops cost a bit more, yet they shine when I’m dipping into oats every week but still want that low‑oxygen environment between uses.
Quick rundown
- Flat bags: slim, cheapest per unit, best for “grab‑and‑go” meal kits.
- Gusseted stand‑ups: self‑supporting, fit more per cubic inch.
- Integrated zipper: adds $0.10–$0.15 per bag but prevents daily iron‑on reseals, saving both time and absorber packets.
Right‑Size Your Stash: Quart, Gallon, 2‑Gallon & 5‑Gallon Bags
Bag volume drives both convenience and shelf life. A study of fill weights shows a 1‑gallon Mylar bag holds roughly 2.2 kg (4.9 lb) of long‑grain white rice—perfect for a family‑size recipe rotation—while a 5‑gallon liner swallows more than 14 kg (33 lb) of the same grain.
| Bag Size | Typical Uses | Rice Capacity* |
|---|---|---|
| 1 quart (6"x10") | Spices, yeast packets, trail snacks | 0.83 lb |
| 1 gallon (10"x14") | Weekly staples, recipe kits | 4.9 lb |
| 2 gallon (12"x20") | Family bulk items, pet kibble | 7–9 lb |
| 5 gallon (20"x30") | Long‑term wheat, beans, oats | 33 lb |
I favor 1‑gallon Mylar bags for variety—if one bag of flour goes bad (rare, but possible), my whole wheat reserve isn’t toast.
Food‑Safe Credentials & Why “Mil” Thickness Matters
Look for labels that read “BPA‑free, FDA‑approved, food‑grade”—anything less is a risk I won’t take. Properly certified bags contain no BPA or phthalates, which eliminates leaching concerns even during hot‑summer storage.
Thickness, measured in mil (0.001 inch), dictates both barrier strength and puncture resistance. Experts recommend 5–7 mil for long‑term dry‑food storage
- 4 mil: fine for short‑term snacks; double‑bag bulk goods.
- 5 mil: sweet spot—good balance of flexibility and durability.
- 7 mil: overkill indoors, but worth it if rodents or sharp corners lurk.
Brand Showdown: Cheap Mylar Bags vs. Canadian Preparedness
Cheaper imports can drop to 3 mil and arrive with pinholes, which turns oxygen absorbers into costly band‑aids. Where as our house‑brand bags spec are 5 mil, BPA‑free, light‑blocking silver—and ship with absorber bundles sized to each bag. The price per unit beats name‑brand by 8–12 percent when you buy a 50‑pack, and you’re not gambling on an unknown factory.
Light‑Blocking Colors & Labeling for Easy Rotation
Silver and matte‑black finishes block 100 percent of visible light, protecting riboflavin and vitamin A in grains far better than translucent buckets. I avoid clear “window” pouches for anything older than six months.
Pro labeling tips:
- Use a bold paint marker to note contents, weight, pack date, and “best by” on both front and back.
- Add a batch number if you’re sealing multiple pounds of the same item in different sessions.
- Store upright in bins by category—grains, beans, baking—which cuts search time in an emergency.
The best mylar bags for long term food storage blend the right style, size, safe materials, and proven brand quality. Spend a few extra cents on 5‑mil, BPA‑free bags and you’ll save entire buckets of food—and dollars—over the next 25 years.
Oxygen Absorbers: The Science behind How Many CCs Your Bag Need?
Iron Powder + Oxygen = Peace of Mind
Every oxygen absorber is a tea‑bag‑sized pouch of powdered iron, salt, and clay. Once you seal the pouch inside a mylar bag, air sneaks through the microporous paper and the iron rusts, locking up oxygen as iron oxide. Thermometers show the packet can warm to 160 °F while working, proof the reaction is busy.
Impressive stat: lab tests record residual oxygen levels of 0.1 percent inside a Mylar bag after 24 hours—ten‑times lower than vacuum sealing (≈2%) and fifty‑times lower than nitrogen flushing (≈5%).
Why CCs matter
One cubic centimeter (cc) equals one milliliter of oxygen at sea level. Choose too few CCs and leftover O₂ turns oils rancid; choose too many and you waste money, but you’ll never hurt the food.
Matching CCs to Bag Size & Food Density
The right absorber size depends on two things:
- Head‑space volume (empty air above and between food pieces).
- How tightly the food packs (flour = dense, pasta = airy).
Below is a condensed take on the oxygen‑absorber chart when I'm preparing to use mylar bags and oxygen absorbers for long term storage:

Rule of thumb:
- 1‑quart snack bag: 100 cc works for anything.
- 1‑gallon staple bag: 300 cc covers most foods, 500 cc for fluffy pasta.
- 5‑gallon liner: start at 1 000 cc and add if food is airy.
I keep three absorber sizes stocked—100 cc, 300 cc, and 1000 cc—and mix‑and‑match instead of buying every size on the chart.
The Sugar Exception—Skip the Absorber
White or brown sugar doesn’t spoil; its enemies are moisture and ants. Drop an absorber in there and you’ll wake up to a brick of rock‑hard sweetener. That’s why most pros store sugar in Mylar without oxygen absorbers and simply keep the bag dry.
Under‑Dose vs. Over‑Dose—What Really Happens
Under‑dosing (too few CCs)
- Residual O₂ stays above 2 percent.
- Fats in flour or brown rice can turn rancid in <12 months.
- Insects may hatch because eggs aren’t suffocated.
Over‑dosing (too many CCs)
- Safe for food—iron just stops reacting once O₂ is gone.
- Wallet pain: using two 500 cc packets when one 300 cc would do costs an extra $0.40 per bag.
- Slight vacuum “crinkle” on the bag can shrink labels but causes no harm.
For me, saving a few dimes isn’t worth losing a year of beans, so I aim high if I’m unsure.
Pro Handling: Keep Spare Absorbers Alive
Oxygen absorbers start working as soon as they hit open air. Here’s how I keep the extras fresh:
- Stage bags first. Pre‑label and half‑seal every Mylar pouch before opening the absorber pack.
- Transfer fast. Drop packets in food bags within 10 minutes of opening the master sleeve.
- Reseal leftovers in a mason jar filled with uncooked rice to scavenge stray moisture, then twist on a lid with a new 100 cc absorber inside.
- Check color indicators (pink means good, blue or gray means spent) before using on the next sealing session.
Handled this way, my open sleeve of absorbers lasts months instead of minutes—saving both time and the emergency budget.
To summarize just remember this; Match the CCs to your bag size and food density, skip absorbers for sugar, and err on the high side for everything else. Nail those numbers and keep your food oxygen‑free—and nutrient‑rich—for decades.
How to Seal Mylar Bags at Home: Step-by-Step
Before I get started, I lay out everything so I’m only racing oxygen, not rummaging drawers:
- Bags: 5‑mil Mylar in the size that matches tonight’s project.
- Heat source: an impulse sealer for perfect one‑click seams, or a household iron/flat iron set to cotton (≈375–425°F). Tests show this temperature window yields the strongest lamination bond on 5‑ to 7‑mil material. topmylar.com
- Oxygen absorbers: pre‑counted to match the CC chart we covered earlier.
- Smooth board: a scrap 2×4 or wood cutting board lets me clamp heat evenly across the edge.
- Marker & painters’ tape: big block letters beat guessing games five years from now.
Having this “seal station” takes two minutes to arrange and saves 20 minutes of panic later.
Label and Fill: Prep Your Food
I always label before food touches the bag—no crumbs on the marker tip, no faded ink. On the front I jot: “Oats – 1 kg – Packed 17 Apr 25 – Best by Apr 50.” Then I fill, leaving 2 inches of head‑space so I can lay the bag flat for sealing. If flour dust coats the interior edge, I give it one swipe with a dry towel; that loose powder is enemy #1 of a perfect seam.
Add Oxygen Absorbers Fast
The clock starts the second you cut the absorber sleeve. I drop packets in within 10 minutes, squeeze air from the bottom up, and give the bag a light shake so the absorber settles dead‑center. Lab benches show open absorbers grab 20 cc of O₂ in the first five minutes—the faster they’re sealed inside, the less capacity you waste
Heat‑Seal Like a Pro
Now comes the magic. Whether I’m using a $30 impulse sealer or the family clothes iron, the goal is the same: a continuous, wrinkle‑free bond.
- Impulse sealer: lay the top edge between the jaws, press for 2–3 seconds (manufacturer’s setting “4” for 5‑mil bags). You should see a shiny ⅜‑inch band.
- Clothes iron/flat iron: set to cotton; run along the edge for 3–5 seconds per section, overlapping passes so no gap escapes.
- Two‑pass insurance: PackFresh USA testing found seam failure dropped from 8 percent to 1 percent when operators made a second quick pass after the bag cooled 10 seconds.
When the bag cools, it should “crinkle‑vacuum” slightly as the absorber kicks in—your audible victory cheer.
Double‑Check and Store Safely
I press the seam gently; any hiss of air means re‑seal now, not tomorrow. Then I tuck the bag upright in a plastic bin or, for best mylar bags for food longevity, slip the whole pouch into a food‑grade bucket with a gamma lid. If you’re storing 5‑gallon liners, leave the bucket lid loose for two hours so absorbers finish their work before final closure.
Troubleshooting snapshot
- Wrinkles in seam? Re‑iron with a protective parchment strip.
- Seal pops open? Bag edge may be dusty—wipe and reseal.
- No vacuum draw after 24 hr? Absorber likely spent; replace and reseal.
FAQs About Mylar Bags
I get these questions every time I demo mylar bags for food storage at trade shows. Let’s clear the air—literally—so you can choose, use, and reuse Mylar with confidence.
Are Mylar bags toxic?
+Short answer: No. Reputable manufacturers use BPA‑free, food‑grade PET laminated to aluminum and polyethylene, all of which pass FDA food‑contact standards. Independent lab tests show zero detectable phthalates or heavy‑metal leaching even after 180 days at 100 °F, a higher‑stress scenario than any basement will see. When you combine that safety profile with a proven oxygen barrier, Mylar remains the best mylar bag option for long‑term staples.
Are Mylar bags recyclable?
+Technically yes, practically not yet for curbside bins. Because Mylar is a multi‑layer laminate (PET + foil + PE), the layers must be separated before reprocessing—a step most municipal plants can’t handle. A recent review of multilayer packaging found only 3 percent of this material stream gets recycled globally.
My rule: reuse before you recycle. Empty 1‑gallon pouches make excellent store‑food meal kits, spice packs, or waterproof electronics sleeves. When a seam finally fails, drop the bag at a specialty film‑recycling depot or a mail‑back program that accepts metallized films.
Are Mylar bags smell‑proof?
+When properly sealed, yes—nearly odor‑proof. Metallized PET posts oxygen‑transmission rates as low as 0.01 cc/100 in²/day, far below the 0.1 cc threshold where human noses begin to sense stale aromas. That ultra‑low permeability also blocks volatile scent molecules. The catch? Odor performance hinges on seal integrity. A pinhole or half‑sealed corner can vent scent like a chimney.
How are Mylar bags made?
+Picture a giant roll‑to‑roll laminator. First, a thin sheet of oriented PET rolls through a vacuum chamber where aluminum vapor condenses onto its surface. Next, a food‑grade polyethylene film is laminated under heat and pressure, locking the foil in place and giving us that weld‑able inner layer. Depending on the end use, converters add more PET or a matte exterior layer, then punch out flat or gusseted pouches. Modern dry‑bond or extrusion lamination lines can run 600 meters per minute, churning out enough barrier film each hour to wrap three football fields.
How to seal Mylar bags?
+In Section above we walked through the process in detail, but here’s the flash card version:
- Pre‑label the bag and stage absorbers.
- Fill with dry goods (≤10 % moisture), tap to settle.
- Add the correct CC absorber and squeeze out head‑space air.
- Heat‑seal at 350–400°F with an impulse sealer or an iron on cotton for 3–5 seconds per pass.
- Inspect the seam; any wrinkle or hiss means reseal now, not later.
Get the seal right and your food in Mylar hits that 25‑year shelf‑life mark without breaking a sweat.
Tips for Storing Different Foods in Mylar
Low‑Oil Staples Thrive in 1‑Gallon Bags
White rice, rolled oats, wheat berries, and dry beans contain ≤ 2 percent fat and ≤ 12 percent moisture, which is why lab tests put their shelf life at 25–30 years when packed with the right absorber in Mylar. I prefer 1‑gallon Mylar bags here—they hold about 5 lb of rice, weigh enough to handle easily, and let me open a single family‑sized portion without exposing the rest of my stash. Label each bag with the absorber size (“300 cc”) in addition to contents, so refills are fool‑proof.
Pre‑Freeze Flour & Grains to Stop Weevils
Even the cleanest mill sneaks a few insect eggs into flour. Freezing for 24–48 hours kills 95–99 percent of beetles, larvae, and eggs before they hatch. I cool‑thaw flour in the fridge overnight to prevent condensation, then pour into Mylar, add a 200–300 cc absorber, and seal. Whole‑wheat and cornmeal—which have more oil—still last only 5–10 years before the germ can go rancid, but that’s a huge jump over the 6–12 months you get in a paper sack.
Freeze‑Dried vs. Dehydrated—Adjust Your CCs
Freeze‑dried meals are fluffy, trapping lots of head‑space air. A manufacturer guideline calls for 400–600 cc absorbers in 1‑gallon bags to hit the 0.1 percent O₂ target, while dehydrated vegetables can squeak by with 300 cc. I pack single‑ingredient veggies by color—green bell pepper, red tomato—to make meal planning simple and avoid flavor cross‑talk.
Silica Packs vs. Oxygen Absorbers—Know When to Use Each
Oxygen absorbers tackle O₂, not water vapor. If you live in a humid climate or store foods that still hold 10–12 percent moisture (think pasta), slip a 10‑gram silica packet in alongside the absorber. The duo keeps both oxidation and clumping at bay. Skip silica with powdery foods like flour—too much desiccation cakes the powder and ruins texture.
My rule of thumb
- Dry, low‑oil foods: oxygen absorber only.
- Medium moisture (≤ 12 %): absorber + silica.
- Sugar & salt: silica alone; absorbers cause brick‑hard clumps.
Smart Labeling & Rotation Prevent Mystery Bags
Nothing wrecks emergency preparedness like playing pantry roulette. I write four data points in black marker, big and bold:
- Product & variety (e.g., “Black Beans – Turtle”).
- Net weight (“2 kg”).
- Pack date (“17 Apr 25”).
- Best‑by (add 25 yrs for most grains, 10 yrs for whole‑wheat).
Store oldest bags in front. Every spring‑clean, I pull one bag from each food type, cook it, and log texture & flavor. A single failed sample beats discovering an entire tote of rancid flour during a crisis.
Size Strategy—Mix 1‑Gallon Variety Bags & 5‑Gallon Staples
For calorie insurance, I keep 5‑gallon liners of rice and wheat tucked in buckets—these are my “base calories.” Then I surround them with 1‑gallon and 2‑gallon Mylar bags of beans, pasta, freeze‑dried veggies, and spice blends for menu variety. If a rodent nibbles a bucket or a child dumps a tote, I still have dozens of smaller bags safe in another corner. Diversifying bag sizes is the prepping equivalent of not putting all your eggs in one basket.
Get Prepped: Building an Emergency Food Reserve
An emergency food storage isn’t a random stack of cans—it’s a calculated safety net that lets me sleep at night. Below is the framework I use to stock, store food, and rotate supplies with mylar bags for food storage as the backbone.
Calculate Your Calorie Budget
Start with the numbers. Health agencies peg daily energy needs for an average adult at 2,000 calories. If you want to plan out your entire family, consider using our calorie calculator
But typically for a family of four planning 14 days, 112,000 calories will be sufficient (2,000 cal × 4 people × 14 days = 112,000 calories)
That’s roughly 80 lb of dry staples—easy to split into six 5‑gallon Mylar‑lined buckets or twenty‑three 1‑gallon bags.
Layer Your Pantry for Flexibility
I structure reserves in three tiers:
| Tier | Container | Purpose |
|---|---|---|
| Base Calories | 5‑gallon Mylar liners in buckets | Rice, wheat, oats—25‑year shelf life |
| Everyday Variety | 1‑ & 2‑gallon Mylar bags | Beans, pasta, flour, baking mixes |
| Grab‑and‑Go | 1‑quart flat pouches | Freeze‑dried meals, trail mix, spices |
This mix prevents the “all eggs in one basket” risk. If a bucket floods, I still have smaller bags elsewhere, and vice versa. It also speeds cooking—no need to crack a 33‑lb wheat bucket just to bake muffins.
Plan Beyond 72 Hours
Most agencies focus on the 72‑hour window; real‑world disasters often extend to two weeks or more. The U.S. Ready.gov hurricane guideline even suggests two weeks of non‑perishables where possible. I build in:
- 72‑hour “bug‑out” kits with portable, ready‑to‑eat foods.
- 14‑day food reserve sealed in Mylar for shelter‑in‑place events.
- 6‑month deep reserve—bulk staples I may never need but gladly rotate into the kitchen before expiry.
Optimize Storage Conditions
Mylar shuts out oxygen, but heat still degrades vitamins. Aim for:
- Temperature: under 70 °F (21 °C) doubles shelf life vs. garage temps.
- Humidity: < 60 percent RH; use desiccant if you live coastal.
- Darkness: stash bags in opaque bins or closets to shield from UV.
One quick trick: place a cheap digital thermometer/hygrometer in each storage area and note weekly readings on a sticky label.
Schedule an Audit
Once a year—mine is every Easter Monday—I pull one bag from each food group, cook it, and log taste, texture, and residual oxygen indicators. My audit takes two hours and has saved me from discovering an entire tote of weevil‑ridden flour during a blackout.
Audit mini‑checklist
- Inspect seams for pinholes or rodent gnaw marks.
- Confirm bag still feels “vacuum tight.”
- Replace any absorber whose indicator dot turned blue/gray.
- Rotate stock: oldest to kitchen, fresh bags to the back.
Don’t Forget Water & Cooking Fuel
All the grain in the world is useless without water and heat. FEMA and the Red Cross agree on one gallon of water per person per day for drinking and sanitation. I keep two 55‑gal drums plus collapsible jugs. For cooking, a camp stove and four 1‑lb propane cylinders handle two weeks of rice‑and‑bean meals.
Grab Your Starter Kit
Feeling overwhelmed? I was, too, until I broke the project into weekends:
- Weekend 1: Buy three 5‑gallon buckets, a 50‑pack of 5‑mil bags, and 1,000 cc absorbers.
- Weekend 2: Fill bags with rice, beans, and oats; seal and label.
- Weekend 3: Add 1‑gallon bags of pasta, flour, and lentils for variety.
Seal the Deal on Your Long‑Term Food Security
When I look at the mountain of information we’ve covered—from why Mylar outperforms buckets to sizing oxygen absorbers, heat‑sealing like a pro, and layering a two‑week‑plus emergency food stash—the takeaway is simple: mastering Mylar turns scattered groceries into a rock‑solid survival reserve. By choosing 5‑mil, BPA‑free bags, matching CCs to food density, pre‑freezing bug‑prone grains, and sealing everything in a cool, dark corner, you lock in calories, nutrients, and peace of mind for decades.